a southern girl's dialogue on life in the rockies

a southern girl's dialogue on life in the rockies.

cooking.baking.teaching.and general merriment.

6.21.2013

I really love my... {personalized ring}

(see here for all the previous posts in the I really love my... series!)

It's back! The I really love my...series is one of my favorites.

I think it's the Southern girl in me, but I love me a good monogram/personalization. Like, it's almost to the point where I need to be careful that I don't have a monogram necklace while carrying a monogram purse with personalized shoes.

Ok, I don't have personalized shoes but that could be cute.

My sweet husband (with prompting from my sweet best friend) gave me the perfect, personalized gift for my birthday this year. A stackable ring with the name of our precious little girl! Right up my alley.


Thin enough to stack with other names (husband, other kids, etc.) or your wedding rings and perfect for daily wear. I love looking down and seeing Charlotte's name everyday. It's oh so very special.

Click here to see all the gorgeous name and monogram ring options on Etsy!

It's good to give your bestie your husband's phone number for reasons like this,
Laura

6.17.2013

Bride + Groom Koozies

Some might say we are currently in the season of summer.

And I might say that those people are wrong.

It is most definitely Wedding Season!

With all the showers, bachelor/bachelorette parties and weddings over the next few months, this is a perfect, easy DIY project to celebrate the lovely bride and groom.


Hit up your local craft store for the following supplies:

2 koozies (I bought a pack of 6 for other projects and used a blue and pink for this project)
A small scrap of black felt (could use black ribbon, too)
Thin blue or white ribbon
Tulle
Hot Glue and a Hot Glue Gun

For the Groom:
Cut the felt (or ribbon) into two pieces. One piece about 1/2 in. x 6 in. and the second piece about 1/4 in. x 3 in. Fold the long piece in half, short end to short end and hot glue. Wrap the smaller piece around the center of the folded piece and hot glue on the back. Voila- a bowtie! Hot glue to the front of the groom koozie.

For the Bride:
I used a roll of tulle and layered it 3 times about 6 in. wide. Tie the thin ribbon into a bow 1/4 in. from the top of the tulle layers. This will create a small 1/4 in. amount of tulle above the bow. Fold that behind the bow and hot glue it to the koozie. Place a small dab of hot glue under the bow, onto the tulle, as well. Voila- a veil!

I made these without taking any pictures of the process so let me know if you have any questions or would like to see some pictures and I will work on that!

Also, let me know if you make some! I'd love to see your renditions!

Enjoy all your weekend wedding celebrations this summer!
Laura

6.14.2013

Father's Day Gift Idea

Father's Day is Sunday.

Nothing like last minute, huh?

I was making some other projects with koozies (see blog on Monday!) and had a great idea for a quick, cheap and simple gift to celebrate my husband's first Father's Day as this cutie's dad!

(shameless plug for my adorable daughter, I realize this)
 

I simply painted my daughter's palms with white paint I had on hand and pressed one on either side of the blank koozie from the craft store.
 
Side note: Although I said "simply", that probably isn't the best adjective to describe this task. It will definitely take two people to hold open your child's palm and paint it if you have a wiggly 7 month old that likes to clasp her hand around things during this stage. Have baby wipes handy and don't be afraid to get a little paint on your hands. If you get extra marks on the koozie or mess up, you can quickly wipe it off with a baby wipe and start over!


After some personalization and a fairly quick dry time, my daughter can now "hold" her daddy's cold drinks. Presh.
 
Time to get crafty!
Laura

6.13.2013

Butternut Soup with Coconut Milk

I have two food weaknesses.

Ok, I have more than two. But two that really stand out when it comes to savory meals.

If I'm at a restaurant and anything on the menu includes butternut squash or goat cheese, it's pretty much a no-brainer that I will get said item

If it includes butternut squash AND goat cheese? Shut the front door...or just the menu. Game over, that's what I will get.

Now that I think about it, I should have topped this soup with goat cheese. Next time, because there will be a next time.

A healthy, light, summer version of a hearty fall soup.

All whipped up in under 30 minutes. That's my kind of summer, weeknight meal!


Butternut Soup with Coconut Milk
Recipe from Cooking Light magazine, February 2013
Prep Time: 10 min. Total Time: 30 min.
Yield: Recipe states serves 8, We ate it as a main course and it served 4
 
Ingredients:
1 tbsp. olive oil
1/2 c. thinly sliced shallots
1 tbsp. minced garlic
1 tbsp. minced, peeled, fresh ginger
2 c. water
1/2 c. canned coconut milk
1 tsp. salt
1/4 tsp. ground red pepper
2 (12 oz.) pkgs. fresh cubed butternut squash (I found this in the produce section near the bags of broccoli, lettuce, etc.)
1 tbsp. fresh lime juice
Ground red pepper for sprinkling at end (optional)
2 c. rice, prepared
 
Directions:
1. Heat a large heavy saucepan over medium-high heat. Add oil to pan. Add shallots and sauté 3 minutes or until softened, stirring occasionally. Add garlic and ginger, sauté 1 minute. Add 2 c. water, coconut milk, salt, red pepper and squash. Bring to a boil. Cover, reduce heat, and simmer 20 minutes or until squash is tender, stirring occasionally.
 
2. Place squash mixture in a blender. Remove center piece of blender lid to allow steam to escape and secure lid on blender. Place a clean towel over top of blender to reduce splatter and blend until smooth. Stir in lime juice. Ladle into bowls and top each serving with about 1/2 c. prepared rice and a sprinkling of ground red pepper if you want extra spice.
 
Enjoy!
Laura
 
P.S. Leftover coconut milk? Use it to make a delicious smoothie in the morning with frozen fruit and spinach! 


6.11.2013

Rose Cake

This post could also be titled, "Ohmygosh I finally made this cake and I'm obsessed."

But I figured that was a little long.

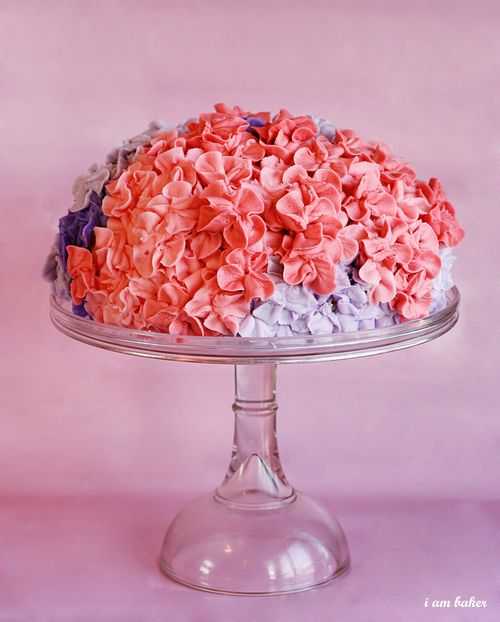
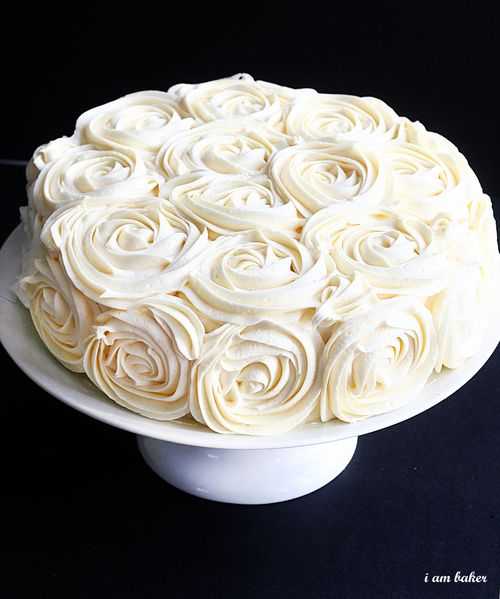
I'm a big fan of all things floral and since I first saw these gorgeous cakes by I Am Baker, I've been in love.

IMG_6416.stamp
 
IMG_9038.stamp
 
These are jaw-dropping, stunning cakes. Made at home!
 
I almost didn't write this post because I didn't want to give away my secret of how EASY this rose cake decoration is. But now you all know.
 
You don't have to tell anyone when you make it, though. It'll be our little secret.
 
Basically, make any cake that you want- chocolate, vanilla, funfetti, homemade, from a box- we are more concerned with the outside here!
 
When I made the rose cake, I made a two layer vanilla cake with a filling of chocolate frosting in between. And it was delicious, FYI.
 
I followed I Am Baker's directions for buttercream icing because it is thick and holds up well when piping the roses. Click here for the recipe. I also froze my cake before icing and applied a thin crumb coat to hide any holes in the rose decoration. For a one-layer of roses cake, I used the entire amount of frosting the recipe prepares. And I mean the entire thing. Like, I was so nervous I'd be one rose short-entire amount. So, keep that in mind!
 
I Am Baker has a great video to show you how simple and quick this frosting décor can be! All you need is a piping bag and a 1M size tip from the craft store!


I can't wait to try this rose frosting out on cupcakes, too! I have a little bit more practicing to do before I can present this as Charlotte's first birthday cake but that just means more cake for us to eat while I practice! Win, win, right?
 
Let me know if you try it out! Her patriotic cake in the video is perfect for 4th of July- right around the corner!
 
Now I want cake,
Laura