a southern girl's dialogue on life in the rockies

a southern girl's dialogue on life in the rockies.

cooking.baking.teaching.and general merriment.

9.28.2012

Friday Funny

As if you couldn't love Ryan Gosling even more than you already did...

 
And in case you haven't seen the website they are talking about- click here.
 
So dreamy.
Laura

9.27.2012

Chalkboard Wall Update

Remember when I showed y'all our chalkboard wall we painted in our new house?

I wanted to give you a little update.

It has been so fun to have friends leave little notes for us and change it out for different events but the most fun I've had with it is so track my growing (and growing...) belly!

My husband is taking my picture every few weeks for our own scrapbook and to email to grandparents, etc. I love the consistent background, how easy it is to change and her monogram on the top!

 
5 more weeks...yikes...
Laura

9.26.2012

Football Menu

As if it even needs to be said, we spent last Saturday at home watching football!

There were 7 of us here for all the night games and I thought I'd share our menu to make your decision easier this upcoming weekend with all the options out there!

This menu was perfect for this amount of people and even had leftovers of the chicken which I have been using for tacos and salads for leftovers this week. Gotta love that.

We started out with chips and Skinny Taco Dip from Skinnytaste...
(although the hub doesn't like olives and I forgot to buy shredded lettuce so it was slightly different yet still delicious!)


Then I cooked a 3 lb. bag of chicken tenderloins at 350 degrees for about 15 minutes, flipped them for about 10 minutes more.  I had coated them in a mixture of oil, water and buffalo chicken seasoning from the grocery store. (You could use any marinade or Frank's Red Hot Wing Sauce would be good, too!) And- voila!- boneless buffalo chicken tenders!

...all served with a side of Oven Fried Pickles from The Culinary Couple that were super yummy and so easy! I will definitely be making these again.

Pinned Image
 
And we finished the night off with Pumpkin Spice Kisses, of course!
 
 
I loved that I didn't spend all day/night in the kitchen prepping food and actually got to enjoy football and our company! I made the cookies before Saturday and made the dip and prepped the chicken in the morning.
 
Also, it was great that I didn't do my typical overboard spread and had the perfect amount of food. Hope this makes your Saturday menu planning a little easier.
 
Now to decide what to make this weekend...
Laura


9.25.2012

Beef and Barley Soup

I wish there was some way I could count the number of times that I've said, "Skinnytaste strikes again!"

She is just so, so good.

What I love is that I am making hearty, delicious meals, sides and desserts that I don't feel guilty about and don't feel like I'm skimping out on a good meal!

She's good. Again.

I'd never cooked with barley before but it was very easy to incorporate into the soup. I found it in the self-serve aisle at my grocery store where you can bag however much you need of different granola, nuts and grains. Perfect.

 
This is a great meal as the weather (hopefully) gets colder and an even better meal to make and freeze the leftovers since it is a broth/water based soup. Everybody loves a meal that leaves your freezer stocked up, as well!
 
Click here to visit Skinnytaste for this hearty soup recipe!
 
I might be Skinnytaste's #1 fan,
Laura
 
P.S. This soup is even better when served with these Rosemary Rolls...and evens out the healthy aspect of the soup...

9.24.2012

Another Monday List

1. Jackpot. An entire list of pumpkin recipes that are all low-fat and healthy. Click here to feel like you've won the lottery. I'm most excited about the Pumpkin Swirl Cheesecake Yogurt Cupcakes.

 
2. Apple season is just starting up and I am excited to hopefully do some canning this week! I'll keep you updated.
 
3. Free advice: keep one dish sponge in your dishwasher and one to use in the sink. Every time you run your dishwasher, switch them out as you unload your dishes. That way your sponges stay as germ-free as possible. And when one starts to bite the dust, switch it out with a new one!
 
4. Staying on the cleaning topic, after washing and drying your towels (bath, kitchen, etc.), and are putting them away, put them on the bottom of the stack in the closet or drawer. So, you are pulling your towels from the top of the pile and replacing the recently washed ones on the bottom. That way you aren't using the same few towels over and over again and wearing them out. I heard this from Martha (Stewart, if you aren't on a first name basis like we are) once.
 
5. I can't stop perusing Etsy for little girl headbands. How are there so many cute options? But what if I buy newborn size and she's born with a massive head (like my husband keeps telling me that he had) and none of them fit? These are the things that keep me up at night. Oh, and my top-heavy, kool-aid man-esque self (see photo for example).
 
Kool Aid Man.jpeg
 
Oh yaaaaaa (said like the kool-aid man, of course),
Laura

9.21.2012

Pumpkin Spice Kisses

I am all over Fall, y'all. It officially starts tomorrow and I think these Pumpkin Spice Kisses are the perfect way to celebrate!


Don't believe me? Let me convince you.

1. They are simple. Like so simple that after I baked them, I was pretty sure I forgot something because it was so simple.

2. They have pumpkin in them! And we are all about pumpkin this season!

3. They even look like Autumn! Perfect colors.

4. 4 ingredients- that's it!

That's all I got.

I hope it's enough.


Pumpkin Spice Kisses- see here for the original recipe!

Side note: The dough is extremely sticky and I substituted the sanding sugar for cute Autumn colored sprinkles from the Target $1 section (love that place!). It's also super important to throw them in the freezer or refrigerator to keep the kisses from melting. Nobody likes melted kisses.

I love that Fall and y'all rhyme.
Laura


9.20.2012

Blog Highlight: papery and cakery

Papery and Cakery is a super cute stationary and sweets online company.

I mean, I guess that is pretty self explanatory by their name.

But their blog is so much more than that!

Monday-Thursday the blog is filled with cute fashion and beauty ideas,

lots of glitter DIY projects...


and lots of non-glitter DIY inspiration...
 
 
party planning ideas and home decor tips!
 
And every Friday, a delicious new recipe from the cakery side!


An adorable trio of sisters runs this business and addictive blog!
 
Check it out here: papery and cakery blog.
 
Great inspiration here!
Laura


9.18.2012

Apple Juice Pound Cake with Apple Juice Glaze

There are pumpkins on our front porch, an apple cinnamon candle burning in the kitchen and a Halloween candy bowl in the entry way.

And it's at least 85 degrees outside.

In Colorado.

In mid-September.

What is happening?!

It has not stopped me from pinning all things Fall, buying pumpkin spice flavored everything and baking a delicious apple flavored pound cake.

Take that, global warming.


This cake is perfect to convince yourself that it is Fall. It's moist on the inside, crunchy on the outside and so very yummy.

 
Apple Juice Pound Cake with Apple Juice Glaze
Yield: 1 loaf
Prep Time: 10 min. Total Time: 1 hr. plus cooling
 

Ingredients:
1/2 c. butter, softened
1/8 c. applesauce
1 1/2 c. sugar
2 eggs
1/4 tsp. salt
1/4 tsp. baking powder
1 1/2 c. all-purpose flour
1/2 c. apple juice
 
For the glaze:
1 1/2 c. powdered sugar
1/4 c. apple juice
 
Directions:
Cream butter, applesauce and sugar together with an electric mixer.
 
Beat in eggs one at a time.
 
In a small bowl, combine salt, baking powder and flour. Whisk to combine. Add to butter mixture, alternating with the 1/2 c. apple juice until completely mixed.
 
Pour into a greased 9x5 loaf pan and bake in a 350 degree oven for 50 minutes or until lightly browned. The center might appear moist- just watch the top for browning.
 
Let cool on a wire rack. Whisk glaze ingredients until smooth and pour over cake. I poured it over while the cake was still warm to create a crunchy top layer but you can also wait until completely cooled.
 
Enjoy!
Laura

9.17.2012

A Friday Funny

....on a Monday.

I know, I know.

But this made me laugh and who doesn't love when Ellen gets tickled at something?

Hope this brightens your day!


"I love Jesus but I drink a little."
Laura

9.13.2012

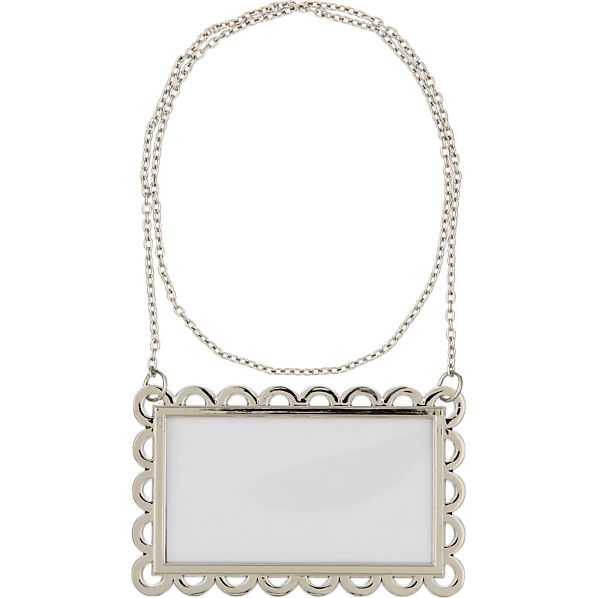
I really love my...{beverage jar labels}

(see here for all the previous posts in the I really love my... series)

I really love my beverage jar labels!

The look of over sized beverage jars is one of my favorite and most simple additions to a party or get together! Even for a Saturday spent watching football with friends, filling a drink dispenser with tea, sangria, a fun cocktail or even water is not only stylish but practical!

This beverage jar label kicks up the cuteness to a whole new level! Simply label the blank tag and string it around the neck of the jar and- voila!- an instant Pottery Barn feel.

And who doesn't want that?

BeverageJarLabelS11

You can buy this little gem here from Crate and Barrel. A great Christmas idea...along with a new beverage jar, too!

So cute!
Laura

9.11.2012

Reese's S'mores Bars

Last Friday, I tweeted this:

"I just made up a dessert so delicious that I wish I'd never made it up."

I'm serious.

I took one bite, immediately set it down and walked away so that I wouldn't devour the entire pan right then and there.

When you are wearing elastic waisted pants because you're pregnant, you have to be extra careful about decisions like eating an entire pan of Reese's S'mores Bars.

S'mores are one of my favorite desserts but I like to kick it up a notch by replacing the chocolate bar with a Reese's Peanut Butter Cup. So when I saw this recipe, I knew I had to make the same switch.


And I still can't decide if I'm glad that I did that or not. This could be detrimental to me getting back in shape post-baby.


Have you gotten the point yet that these are really, really, really delicious?!

Ok, good.


Reese's S'mores Bars
Recipe adapted from Lovin' From the Oven
Yield: 16 bars
Prep Time: 15 min. Total Time: 45 min.
 
Ingredients:
1/2 c.  (1 stick) unsalted butter, room temperature
1/2 c. granulated sugar
1/4 c. brown sugar
1 large egg
1 tsp. vanilla extract
1 1/3 c. all purpose flour
1 tsp. baking powder
3/4 c. crushed graham crackers (I used my food processor)
1/4 tsp. salt
1 1/2 c. marshmallow fluff/creme (not melted marshmallows!)
12 Reese's Peanut Butter Cups, unwrapped (6 packages/2 in each)
 
Directions:
Preheat oven to 350 degrees and thoroughly grease an 8 in. square pan.
 
With a mixer, cream the butter and both sugars together. Add in the egg and vanilla extract and mix until combined.
 
In a small bowl, whisk together the flour, graham cracker crumbs, baking powder and salt.
 
Slowly add the flour mixture to the butter and sugar and mix until combined.
 
Divide the dough in half and press half into the bottom of the prepared pan. Top with 12 Reese's (3 rows of 4) and cover with the marshmallow creme/fluff.
 
Place remaining dough in a single layer on top of the fluff. (This is best done by pressing the dough into flat shingles with your hands and laying on top.)
 
Bake for 30 minutes or until lightly browned. Let it cool completely before cutting into bars.
 
Let me know if you make them and if you love them as much as I do!
 
Enjoy!
Laura


9.10.2012

Grandma's Spot Remover

I really dislike it when I ruin a shirt because of a stain. Good intro, I know.

If I'm cooking and some oil, grease or anything lands on my clothes, I immediately regret it.

Well, the kind ladies at Hobby Lobby introduced me to Grandma's Spot Remover and it is my go-to stain remover! I've used it to get rid of oil splatters, blood, sweat marks and wine. This stuff is like liquid spot remover gold. I use it on our sheets and pillowcases, too (anyone else get mascara on their pillowcases sometimes?).


You can find this little gem at the checkout lane at Hobby Lobby!

Grandma knows what she's talking about!
Laura

9.06.2012

Nanaimo Bars

Wait...what?

Yeah, I have no idea how to pronounce it either.

But that doesn't matter once you eat one.

You'll just call it that incredible, Canadian goodness bar thing.

Works for me.


Our good Canadian friend introduced me to Nanaimo Bars about a year ago when he brought some back from Canada, knowing my affinity for sweets. The three layers combine chocolate, coconut, nuts, powdered sugar, graham crackers...you know, all the good things in life.

It's a great no-bake recipe that is perfect for this still hot weather we've had lately!

He recently house sat for us while we were on vacation and I recreated these bars as a thank you for him. I must say, they turned out absolutely delicious!


Nanaimo Bars
Adapted slightly from Joy of Baking
Prep Time 30 min, overall Total Time: 2 hours, including cooling
Yield: 25 bars
 
Ingredients:
 
Bottom Layer:
1/2 c. unsalted butter, room temperature
1/4 c. granulated white sugar
1/3 c. cocoa
1 large egg, lightly beaten
1 tsp. vanilla extract
2 c. crushed graham cracker crumbs (I used the food processor)
1 c. shredded coconut
1/2 c. coarsely chopped walnuts (food processor again)
 
Middle Layer:
1/4 c. unsalted butter, room temperature
3 tbsp. cream
2 tbsp. vanilla pudding powder
1/2 tsp. vanilla extract
2 c. powdered sugar
 
Top Layer:
1 c. semi-sweet chocolate chips
2 tbsp. unsalted butter, room temperature
 
Directions:
Spray an 8x8 pan with nonstick spray.
 
Bottom Layer:
In a saucepan over low heat, melt the butter. Remove from heat and stir in the sugar and cocoa powder and then slowly whisk in the beaten egg. Return the pan to low heat and cook 1-2 minutes, stirring, until the mixture thickens. Remove from the heat and stir in the vanilla, graham cracker crumbs, coconut and chopped nuts. Firmly press the mixture into the bottom of the prepared pan. Cover with wrap and refrigerate until firm, about an hour.
 
Middle Layer:
Using your mixer, beat the butter until smooth and creamy. Add the remaining ingredients for the middle layer and beat until smooth. If the mixture is too thick to spread, add a little more cream. Spread over the bottom layer, cover and refrigerate about 30 minutes.
 
Top Layer:
In a microwave safe bowl, melt the chocolate chips and butter in 30 second increments, stirring in between, until melted. Spread the melted chocolate over the middle layer, cover and refrigerate until set, about 10 minutes. Cut into squares using a sharp knife.
 
Store in the refrigerator.
 
Enjoy!
Laura


9.05.2012

Bundt Part 2

Y'all. This is so exciting. After writing yesterday's post on Nordic Ware Bundt Pans, I went downstairs to look at the bundt pan that was my grandma's and she brought it up here in May.

It's the classic bundt pan made by Nordic Ware!

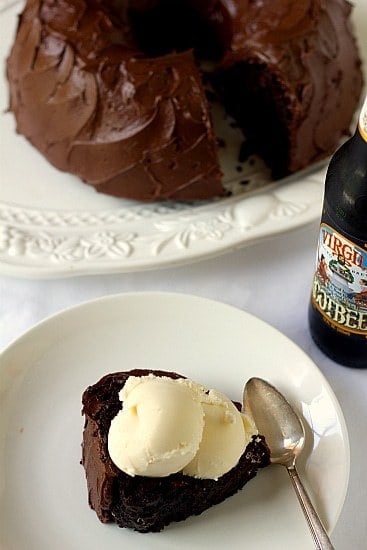
So, I immediately had to find a delicious recipe to fulfill my bundt cake desire. Here are some contenders...

Kristenpost


There are way too many delicious looking options and the shape the gorgeous pans provides makes the decision even harder! Can't wait to try!
 
Bundt is a funny word.
Laura


9.04.2012

Nordic Ware

A pro of pregnancy is that after you wake up in the morning, eat, maybe start some laundry or something, it is perfectly acceptable to lay back down on the couch for a little rest.

It's for the baby, of course.

During one of these couch recovery times, I caught the last half of the Martha Stewart show when she had the family that created the Nordic Ware bake ware line on to show their gorgeous pans and make some delicious bundt cakes!

I've always seen these pans, especially during the holiday season, at Williams-Sonoma and, although I've admired them, never realized what made them so special. Well, Martha changed my outlook on that.

Nordic Ware is a family company that has been around for over 65 years. Their pans are all made in the USA and create stunning cakes that are a piece of art in themselves. The bundt pans (they make cookware, etc. as well!) are made of non-stick, lightweight yet durable cast aluminum which creates immaculate detail as well as distributes heat evenly while baking.

What really won me over was seeing all the amazing designs lined up next to each other. Look at some of these beauties...

Product [image]
 
 
Product [image]
 
Product [image]
Product [image]
Product [image]
And look how gorgeous the cakes turn out when baked in these pans!


This is just a small preview of their unique bundt pans and designs! Martha even made a suet bird food bundt pan for the birds in winter! She's so good.
 
They did mention that thicker, more dense batters work best in these pans to hold up to the details it makes.
 
Click here to watch the clip of Nordic Ware founder's granddaughter baking with Martha.
 
Now to pick just one...
Laura