a southern girl's dialogue on life in the rockies

a southern girl's dialogue on life in the rockies.

cooking.baking.teaching.and general merriment.
Showing posts with label dinner. Show all posts

6.13.2013

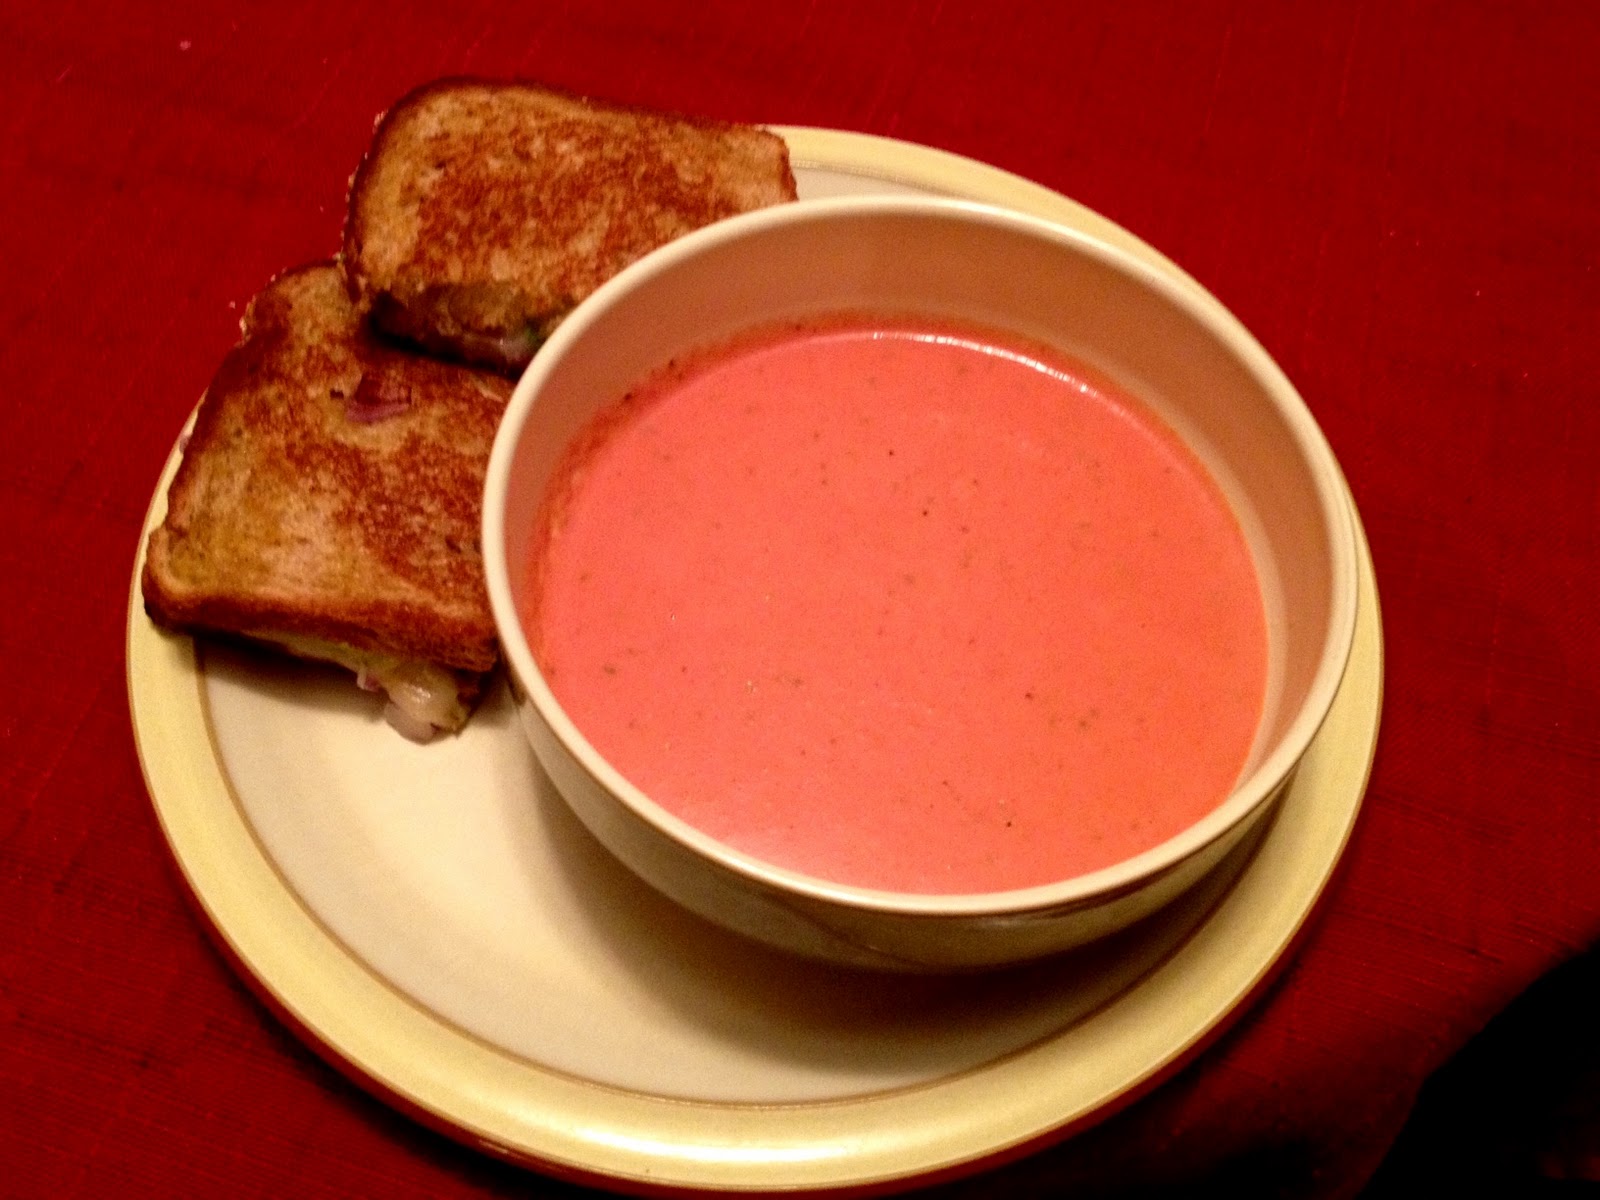
Butternut Soup with Coconut Milk

I have two food weaknesses.

Ok, I have more than two. But two that really stand out when it comes to savory meals.

If I'm at a restaurant and anything on the menu includes butternut squash or goat cheese, it's pretty much a no-brainer that I will get said item

If it includes butternut squash AND goat cheese? Shut the front door...or just the menu. Game over, that's what I will get.

Now that I think about it, I should have topped this soup with goat cheese. Next time, because there will be a next time.

A healthy, light, summer version of a hearty fall soup.

All whipped up in under 30 minutes. That's my kind of summer, weeknight meal!


Butternut Soup with Coconut Milk
Recipe from Cooking Light magazine, February 2013
Prep Time: 10 min. Total Time: 30 min.
Yield: Recipe states serves 8, We ate it as a main course and it served 4
 
Ingredients:
1 tbsp. olive oil
1/2 c. thinly sliced shallots
1 tbsp. minced garlic
1 tbsp. minced, peeled, fresh ginger
2 c. water
1/2 c. canned coconut milk
1 tsp. salt
1/4 tsp. ground red pepper
2 (12 oz.) pkgs. fresh cubed butternut squash (I found this in the produce section near the bags of broccoli, lettuce, etc.)
1 tbsp. fresh lime juice
Ground red pepper for sprinkling at end (optional)
2 c. rice, prepared
 
Directions:
1. Heat a large heavy saucepan over medium-high heat. Add oil to pan. Add shallots and sauté 3 minutes or until softened, stirring occasionally. Add garlic and ginger, sauté 1 minute. Add 2 c. water, coconut milk, salt, red pepper and squash. Bring to a boil. Cover, reduce heat, and simmer 20 minutes or until squash is tender, stirring occasionally.
 
2. Place squash mixture in a blender. Remove center piece of blender lid to allow steam to escape and secure lid on blender. Place a clean towel over top of blender to reduce splatter and blend until smooth. Stir in lime juice. Ladle into bowls and top each serving with about 1/2 c. prepared rice and a sprinkling of ground red pepper if you want extra spice.
 
Enjoy!
Laura
 
P.S. Leftover coconut milk? Use it to make a delicious smoothie in the morning with frozen fruit and spinach! 


5.16.2013

Slow Cooker, Day 4

Sometimes, you just want to throw things in a slow cooker, walk away and come back a few hours later and eat.

Is that too much to ask?

And sometimes, you don't want to go to the store and buy unique ingredients or dirty six bowls and pans before your slow cooker meal even starts to cook.

Here I am, saving the day. Here are five of my favorite ways to get dinner on the table without utilizing one brain cell to prepare. Lovely visual.


1. Throw in however many chicken breasts you need for your crowd at dinner that night, a packet of taco seasoning (or any Mexican inspired spices you have!), 4-8 oz. cream cheese (based on the chicken breasts amount) and a jar of salsa. As a bonus, if you have a can of corn or any beans on hand, feel free to throw those in, as well. Cook on low for 4-6 hours and shred to use in tacos, fajitas, taco salad or quesadillas.

2. Line the bottom of the slow cooker with sliced red apples, top with boneless pork chops, sprinkle with cinnamon and more sliced apples. Pour in 1/4 c. water for moisture. Cook on low for 4-6 hours. Serve with stuffing.

3. Same as #1, throw in however many chicken breasts your need for dinner that night. Pour one can Coke/Dr. Pepper/Pepsi/Root Beer (your choice!) and enough BBQ sauce over chicken until covered. Cook on low for 4-6 hours. Serve with mashed potatoes or shred for sandwiches, salad or chicken salad!

4. Line the bottom of your slow cooker with sliced bell peppers and a sliced onion. Pour about 1/2 cup-1 c. Italian salad dressing over the veggies. Once again, throw in those chicken breasts! (Can you tell we always have a bag or two of frozen chicken breasts in the freezer?) Sprinkle salt, pepper and cumin over the chicken. Cook on low for 4-6 hours. Serve as fajitas or in quesadillas! This is one of my favorites!

5. A twist on Thanksgiving! Dump a bag of frozen veggies in the slow cooker (peas and carrots are good), top with 4 chicken breasts, a can of cream of mushroom soup and a box of stuffing, prepared. Cook on low for 6-8 hours or high 3-4. A meal in itself! Maybe get some pie for dessert!

Let me know if you try any of these recipes! I think you'll find yourself rekindling your love affair with the slow cooker.

Enjoy!
Laura

5.14.2013

Slow Cooker Week, Day 2

When you have a baby, people bring you dinner. I wouldn't say it's the best part of having a baby (because then I'd sound like a horrible mom) but it's definitely up near the top of the list.

And then your best friend comes to visit and she not only cooks you dinner when she is there but puts something in the crock pot for you to have that night after she leaves. I'm lucky, I tell ya.

I've been remaking the Cashew Chicken on a regular basis over the past few months to rave reviews. It's simple, flavorful, unique and delicious!! All really great adjectives there.

I love that I only have to pick up a few ingredients at the store and already have the rest on hand, ready to go.


Slow Cooker Cashew Chicken
Recipe slightly adapted from Six Sisters' Stuff (super cute sisters!)
Yield: 4-6 servings
 
Ingredients: 
2 lbs boneless, skinless chicken breast tenders
1/4 cup all purpose flour
1/2 tsp black pepper
1 Tbsp canola oil
1/2 cup soy sauce
4 Tbsp rice wine vinegar (I've used apple cider vinegar when I don't have rice wine on hand!)
4 Tbsp ketchup
3 Tbsp brown sugar
2 garlic cloves, minced
1 tsp grated fresh ginger
1/2 tsp red pepper flakes
1/2 cup cashews
 
Directions:
Combine flour and pepper in large zippered bag, add chicken and shake to coat with flour mixture. Heat oil in skillet over medium-high heat. Brown chicken about 2 minutes on each side. Place chicken in slow cooker. Combine soy sauce, vinegar, ketchup, sugar, garlic, ginger, and pepper flakes in small bowl; pour over chicken. Cook on LOW for 3 to 4 hours. Add cashews and stir. Serve over rice.
 
Enjoy!
Laura

5.07.2013

Smashed Hot Sweet Potatoes

There are two types of people in this world.

People that actually try out recipes that they pin on Pinterest...and those who don't.

I was totally in the latter category for a while and then I decided I couldn't be that person anymore. I needed to make some changes in my life, starting with cooking things I pin. (Being a little over dramatic here, I know.)

These Smashed Hot Sweet Potatoes were one of the first things I tried and they were a hit! Super easy, flavorful and a nice change from sweet potato fries. Not that I really needed a change from sweet potato fries, those are my fav.

Crispy, sweet and spicy outside, soft, fluffy inside. A match made in heaven...or in your own kitchen!

crash hot sweet potatoes on a plate
 
Crash Hot Sweet Potatoes
Prep Time: 30 min. Total Time: 1 hour
Recipe from The Creekside Cook (lots of great recipes!)
 
Ingredients:
1 & ½ tablespoons light brown sugar
½ teaspoon kosher salt
½ teaspoon ground cumin
½ teaspoon New Mexico chili powder
½ teaspoon smoked sweet paprika
¼ teaspoon onion powder
¼ teaspoon chipotle chili powder
⅛ teaspoon granulated garlic
10 coarse grinds of black pepper
2 medium to large sweet potatoes
2 tablespoons melted butter
2 tablespoons olive oil
 
Directions:
  1. Set a large pan of water with a teaspoon of kosher salt over medium heat until simmers.
  2. Cover a large baking sheet with foil.
  3. In a small bowl, mix together all of the dry spices, and set aside
  4. Peel the sweet potatoes, and cut into 1 & ½ inch thick slices.
  5. When the water is simmering, add the potato slices and cook for around 10 minutes, until the slices are getting a little soft. (Make sure they are soft enough to mash!)
  6. Remove the slices to a cooling rack. You can leave them on the rack until they cool off and the outsides are dry, or if you are in a hurry, blot all of the moisture from the surface of the slices. This is important – they have to be dry on the outside or they won’t get crispy.
  7. Start the oven preheating to 400º
  8. Lay the slices of sweet potato on the prepared pan, and use a water glass to gently compress each slice – you want them to flatten out and the edges should get kind of ruffly.
  9. Mix the butter and oil together.
  10. Using a pastry brush or the back of a spoon, spread a thin layer of the oil and butter mixture on each slice.
  11. Sprinkle some of the spice mixture over each slice, and press onto the surface lightly so that it sticks to the potato slices.
  12. Gently turn oven each slice, and repeat the oil/butter and dry spice application as you did on the first side.
  13. Roast in the oven for about 15 minutes, until the bottom of the slices is getting caramelized and crispy.
  14. Carefully flip over each slice and roast another 10 minutes or so, until both sides are crispy and the spice mixture has melted together and turned all nicely brown.
  15. Serve!
Enjoy!
 
Now to start trying out my work-out pins...
Laura


4.29.2013

Baked Spaghetti Squash and Cheese

Supposedly all you have to do is cut a spaghetti squash in half, drizzle it with EVOO, roast it in a 375 degree oven for about an hour and you can pull a fork through the guts and make little spaghetti that are actually SQUASH! Say whaaattttt?

Y'all, it's true! I've tried it and it couldn't be simpler!

You can toss it with pasta sauce and add a chicken breast but how blasé would that be! (Blasé aka bland, boring, beneath your taste buds). But, if you do want to do that some night, I'm totally not judging.

Once you make SkinnyTaste's Baked Spaghetti Squash and Cheese, though, you will understand how blasé the first option sounds.

Strings of spaghetti squash, mixed with onions, spinach and made creamy with cups of cheddar cheese and sprinkled with Parmesan. And baked until bubbly. The hardest part of this recipe is cutting the spaghetti squash. (Seriously, does anyone else struggle with this? It's a job for my hubby.)

 
It's a low-fat, veggie-rich dish that tastes so decadent you'd never know it was skinny!
 
Move over mac and cheese, there's a new dish in town.
Laura

(P.S. That last line re: the mac and cheese makes me giggle.)

10.29.2012

Halloween Dinner

I love these cute ideas for a pre trick or treating (or waiting for trick or treaters at your house!) dinner! So festive, easy and a great memory maker!

Ghost Pizza
Pinned Image

Halloween Stuffed Peppers
Pinned Image

Mummy Dogs
Pinned Image

Jack O Lantern Quesadillas
Pinned Image

Boo-ghetti
 
Happy Halloween Eating!
Laura

10.18.2012

Beer Bread

In case you haven't picked up on things around here, I love any recipe that is simple.

Rosemary Rolls? Simple.

Tomato Soup? Simple.

Cornflake Chicken? Simple.

And this recipe is no different.

Bake at 350 is another one of my daily blog reads that is full of sweet and decadent treats. Not to mention, she is an amazing cookie decorator and has a new book out full of gorgeous designs with step-by-step illustrations!
Decorating Cookies: 60+ Designs for Holidays, Celebrations & Everyday

And, although her cookie decor is simply amazing, it's her beer bread recipe that has become a staple for me. 

Take a basic mixture of self-rising flour, butter and sugar and mix it up with different types of beer and fillings. 

For example...


How great do those flavors sound?

I have tried all but the classic (because really, when you have those other flavor options, do you really want it to be so plain?) and it is hard to pick a favorite. 

The chocolate chip is perfect for a sweet breakfast (yes, I said breakfast) or mid-afternoon snack that fills my sweet tooth.

The orange nutmeg really does taste like a breakfast option or the perfect companion to a hearty pork dish.

And you can't go wrong with rosemary in my book. Add gruyere to that, too? Perfection with a bowl of soup. 

I like to pour the batter into small loaf pans and pass them out to neighbors and friends, too. One for you, one for me. 

Click here for the link to the basic recipe and how to make all the variations! 

The hardest part is choosing which one to start with!
Laura

10.17.2012

Baked Chicken Chimichangas

Remember that time I posted about a Mexican restaurant in Las Vegas and said the word "chimichanga" about 18 times? Well, get ready because here we go again.

My bestie kept raving about a recipe she found for baked chimichangas and said she had been making them almost weekly because they were so simple and delicious.

I gave it a try one night and, not that I doubted her, but I was reminded why we are best friends. She was so right on about these chimichangas.

She suggested a few tweaks and the recipe made 10 chimichangas! So, if you know me very well, you'll know that "freezer meal" immediately popped into my head. I cooked 6 that night for dinner and lunches the rest of the week for me and the hub and froze the other four. I wrapped the uncooked chimichangas in foil and threw them all in a freezer bag! Perfect for once Charlotte arrives and we can pull out one or all 4 of them for dinner.

This is a new favorite of mine for our own house and I think it'd be perfect to take to neighbors and friends when they have a new baby or other life changes!


Baked Chicken Chimichangas
Yield: 10 chimichangas
Prep Time: 30 min. (including cooking chicken) Total Time: 1 hr. 
 
Ingredients:
2 cups cooked, shredded chicken (I cooked a few chicken breasts for multiple meals and shredded 2 in the food processor)
1 pkg. Mexican style rice, prepared
1 can Ro-tel
1 tbsp chili powder
1 tsp cumin
1/2 tsp oregano
1/4 tsp onion powder
1/4 tsp garlic powder
pinch of cayenne pepper
salt and pepper
6-8 ounces of shredded cheese (I used a Mexican mix)
10 burrito-size tortillas
Canola Oil for brushing
 
Directions:
Puree Ro-tel in food processor or blender and pour into medium mixing bowl. Add the chili powder, cumin, oregano, onion powder, garlic powder and cayenne pepper. Stir in the shredded chicken, rice and taste, then season with salt and pepper if needed. You can refrigerate the mixture here for a few hours or days, if need be, to make dinner prep simple!

Preheat oven to 400 degrees. Spray a baking sheet with cooking spray.

Wrap tortillas with a damp paper towel and microwave for 30-60 seconds to soften.

To build the chimichangas place a handful of cheese on the tortilla and top it with about a 1/2 c. of the chicken mixture. Fold the bottom of the tortilla over the mixture, fold up the sides and roll the chimichanga on top of itself. (See here for a visual of rolling up the chimichanga). Place seam side down on the baking sheet and brush with canola oil. If freezing, wrap in foil and place in labeled freezer bag.
 
Bake for 17-20 min. or until golden brown. Serve with sour cream, salsa and chopped avocado for topping!
 
Enjoy!
Laura

10.02.2012

Caramel Apple and Pumpkin Spice Bread

I've heard that indecisiveness is common when you're pregnant.

Well, when you have delicious options like Caramel Apple Swirl and Pumpkin Spice Swirl bread, how is anyone supposed to chose just one? Pregnant or not.


Needless to say, I bought both at the grocery store last week.

Let the taste test begin!

First up, toasted with a thin layer of butter. Hands down- Caramel Apple Swirl bread takes the cake. The apple flavor is strong but not overpowering. It tasted actually very fresh and made me feel like I was smack dab in the heart of Autumn. Despite the heat blazing outside.

The Pumpkin Spice Swirl bread was still delicious, don't get me wrong, but this was a competition and like all good competitions, there can be only be one winner.

I knew both of these breads would be even better as french toast.

And I was right.

The Pumpkin Swirl bread got the normal French toast treatment.

But the Caramel Apple Swirl Bread got kicked up a notch.

An apple and cinnamon-cream stuffed notch.

Reminiscent of the Peaches 'n Cream Stuffed French Toast but with a fall twist.


 Caramel Apple 'n Cream Stuffed French Toast
Prep Time: 15 min. Total Time: 25 min.
Yield: 2 servings
For the apples:
1 thinly sliced apple
1/2 tsp. cinnamon
Dash vanilla extract
1/2 tbsp. white sugar
1 tbsp. water

For the filling:
4 ounces cream cheese, softened
1 tablespoon powdered sugar
1/2 teaspoon ground cinnamon
1/2 teaspoon vanilla extract
1 cooked apple

For the French toast:
4 slices Caramel Apple Swirl Bread
4 large eggs
1/2 cup milk
1 teaspoon vanilla extract
1/2 teaspoon ground cinnamon

Diced apples and maple syrup, for serving

Directions:
First, cook the apple. Combine all the apple ingredients in a small saucepan and cook over medium-low heat until the apples are tender but still have a slight crunch. About 15 minutes.

To make the filling, in a small bowl, mix cream cheese, powdered sugar, cinnamon and vanilla extract, until smooth. Spread cream cheese filling on slices of bread; top with cooked apple slices. Make two French toast "sandwiches."

In shallow pan, whisk eggs, milk, vanilla, and cinnamon. Dip the sandwiches in the egg mixture, on each side. Do not let the bread sit in the egg mixture for very long.

Heat a large skillet or griddle to medium-high heat. Cook French toast sandwiches, on both sides, until golden brown, about 4-5 minutes each side. Serve warm with diced apples and maple syrup.

Enjoy!
Laura

9.26.2012

Football Menu

As if it even needs to be said, we spent last Saturday at home watching football!

There were 7 of us here for all the night games and I thought I'd share our menu to make your decision easier this upcoming weekend with all the options out there!

This menu was perfect for this amount of people and even had leftovers of the chicken which I have been using for tacos and salads for leftovers this week. Gotta love that.

We started out with chips and Skinny Taco Dip from Skinnytaste...
(although the hub doesn't like olives and I forgot to buy shredded lettuce so it was slightly different yet still delicious!)


Then I cooked a 3 lb. bag of chicken tenderloins at 350 degrees for about 15 minutes, flipped them for about 10 minutes more.  I had coated them in a mixture of oil, water and buffalo chicken seasoning from the grocery store. (You could use any marinade or Frank's Red Hot Wing Sauce would be good, too!) And- voila!- boneless buffalo chicken tenders!

...all served with a side of Oven Fried Pickles from The Culinary Couple that were super yummy and so easy! I will definitely be making these again.

Pinned Image
 
And we finished the night off with Pumpkin Spice Kisses, of course!
 
 
I loved that I didn't spend all day/night in the kitchen prepping food and actually got to enjoy football and our company! I made the cookies before Saturday and made the dip and prepped the chicken in the morning.
 
Also, it was great that I didn't do my typical overboard spread and had the perfect amount of food. Hope this makes your Saturday menu planning a little easier.
 
Now to decide what to make this weekend...
Laura


9.25.2012

Beef and Barley Soup

I wish there was some way I could count the number of times that I've said, "Skinnytaste strikes again!"

She is just so, so good.

What I love is that I am making hearty, delicious meals, sides and desserts that I don't feel guilty about and don't feel like I'm skimping out on a good meal!

She's good. Again.

I'd never cooked with barley before but it was very easy to incorporate into the soup. I found it in the self-serve aisle at my grocery store where you can bag however much you need of different granola, nuts and grains. Perfect.

 
This is a great meal as the weather (hopefully) gets colder and an even better meal to make and freeze the leftovers since it is a broth/water based soup. Everybody loves a meal that leaves your freezer stocked up, as well!
 
Click here to visit Skinnytaste for this hearty soup recipe!
 
I might be Skinnytaste's #1 fan,
Laura
 
P.S. This soup is even better when served with these Rosemary Rolls...and evens out the healthy aspect of the soup...

8.27.2012

Root Beer BBQ Pulled Pork

The hubster told me the other day that he doesn't like things made in the crock pot.

What?

Does that even make sense?

The crock pot is just basically an oven and one of God's greatest gifts to women.

Strange man.

Normally, I try to respect his opinions on things I make in the kitchen but this one I just had to say that he's going to have to deal with it. Because the crock pot ain't leaving. Because the crock pot makes delectable creations like this Root Beer BBQ Pulled Pork so easy!

My mom made this when I was in Oklahoma a few weeks ago and I made it last week for my husband's pot luck lunch at work...and stole some to eat for ourselves, at home, too!


 Root Beer poured on top...


Shredded and drained...


BBQ Sauce mixed in and ready to eat!


Root Beer BBQ Pulled Pork
Adapted slightly from The Girl Who Ate Everything
Yield: A lot...
Prep Time: 5 min. Total Time: 6-8 hours

Ingredients:
-Half gallon root beer
-2 Pork Butt (see picture) or tenderloin
-18 oz. BBQ sauce (plus more for serving, if desired)
-Slider buns for serving (I like the Hawaiian Sweet Rolls)

Directions:
-Place the pork in the slow cooker and pour the root beer over the meat.

-Cover and cook on low for 6-7 hours, until the pork shreds easily with a fork.

-After the pork has cooked, drain and discard the root beer. I pulled out the meat with tongs into a bowl and poured the rest of the liquid into the sink then put the meat back in the slow cooker.


-Pour the BBQ sauce over the meat and stir to combine. You can either serve immediately on buns or keep on warm until you're ready to serve.

(For the pot luck, I started the slow cooker at midnight, drained the meat and added the BBQ sauce at 6:30am before he left for work. He took the slow cooker to work and kept it on warm and added a little more BBQ sauce before serving.)

Enjoy!
Laura

8.02.2012

Cornflake Chicken

How have I not blogged about this before?!

I talk a lot about simple recipes that are "go-to" for me. This dinner hits the nail on the head for that.

It is one our favorite summer dinners and is perfect to take to lunch in the park, a picnic dinner or a casual night at home!

Cornflake Chicken!


I've tried multiple versions but the best one is found here by Kellogg's. The only modifications I make is using boneless, skinless chicken tenders instead of chicken pieces (as called for in the recipe) so they only take about 15 minutes in the oven.

Next time you're at the grocery store, look for the boneless, skinless thin chicken tenders to be on sale and stock up in your freezer! You can also pick up some boneless, skinless chicken breasts and ask the grocery store butcher to slice them into thin strips for you (free of charge!). They really are better as little chicken fingers because you get a lot of crunch from the coating that way!

We always have a box of cornflakes on hand for when I'm in a dinner rut. This is great because you probably have all the ingredients, except the cornflakes, at home so you can pick up one ingredient at the store and- voila!- dinner is served.


Click here for the original recipe!

Enjoy!
Laura


7.23.2012

Christmas in July Orzo Salad

What is it about red and green that automatically makes you think of Christmas? I can't even cook with red and green without humming Jingle Bells.

Which is how this Christmas in July orzo salad came about!


A quick, easy side dish when the last thing you want to do is slave over dinner in the summer! 


Christmas in July Orzo Salad
Serves 4 as a side dish
Prep Time: 5 min. Total Time: 20 min.

Ingredients:
-1 c. orzo
-2 cloves garlic, minced
-1/2 green bell pepper, diced
-3/4 c. cherry tomatoes, sliced in half
-1 tbsp. EVOO (extra-virgin olive oil)
-Grated Parmesan cheese
-Handful of fresh basil, chopped
-Balsamic Vinegar

Directions:
Cook orzo according to box directions.

Meanwhile, saute garlic in EVOO until slightly browned and fragrant. Add bell peppers and cherry tomatoes and cook over low-medium heat, stirring occasionally, until veggies are soft.

When orzo is done cooking, drain and combine with vegetable mixture.

Add a large splash of balsamic vinegar and drizzle with more EVOO.

Top with chopped basil and Parmesan cheese.

Enjoy!
Laura


7.10.2012

Cheesy Jalapeno Popper Baked Chicken

I've said it before, and I'll say it again- Skinnytaste strikes again!

I'm trying to come out of my recipe rut and man, oh, man, did I ever. I made these Skinny Cheesy Jalapeno Popper Baked Chicken breasts last week and they were a hit! I used 3 chicken breasts sliced in half, so that's 6 pieces for you non mathematicians, and we enjoyed them for leftovers all week long!


It's the perfect combination of everything you love about jalapeno poppers- cream cheese, cheddar cheese, bacon and a kick from the jalapeno- in dinner form! A winning summer dinner!

These will definitely be making an appearance around this house soon!

Here is the link to the original recipe: Cheesy Jalapeno Popper Baked Chicken.

Enjoy!
Laura

6.25.2012

Rhoad's Rolls Pizza

I don't want to brag or anything, but ever since I've been pregnant, I've become the queen of easy, simple weeknight dinners. Between exhaustion, back pain and overall "I'm carrying a child here" symptoms, cooking nightly dinners has become tough for me!

But the upside of this is that we have found some of our favorite new recipes this way! For example, the Grape Tomato Pasta dish! Another new favorite is even easier than that- Rhoad's Rolls Pizzas.

I've talked about my love for Rhoad's Rolls before with these Rosemary Rolls and my love continues.
 
Simply pull the rolls out of the freezer a few hours ahead of time (or use the simple thaw method on the back of the bag) and let rise. Once they have doubled in size, preheat your oven to 400 degrees and spray your pan really well with non stick spray!

Smush (very technical here) the rolls into flat circles and top with your favorite pizza toppings! This was great because the hubster likes red sauce with his toppings and I'm more of an EVOO pizza type of girl so we were able to personalize our own just the way we like it. Sort of like Burger King...

Bake for about 10 minutes or until the edges are lightly browned. Simple and delicious! The hubster even said he liked these better than the typical pizza we make.

(Let's not even pretend this picture is appetizing- I was starving and couldn't mess around with food photography biz-nass).


Just FYI- I ate two of these babies and the hubster had three, so plan accordingly. And make some for leftovers- they were a great lunch the next day.

I like calling myself the Queen,
Laura

6.06.2012

Blue Cheese Herb Loaf

Do y'all like blue cheese? Do you eat it by the spoonful and then maybe add a cracker as an afterthought?

Nope?

Just me?

Alright, well this loaf might not sound too appealing to you but even my blue cheese loathing hubby thought it was delicious!

Although yesterday's pork roast recipe would be amazing with PW's Rosemary Rolls, this Blue Cheese Herb Loaf was a hit, too!

Feel free to substitute a different cheese if blue cheese isn't your thing!


Blue Cheese Herb Loaf
Yield: 8 servings
Prep Time: 10 minutes Total Time: 30 minutes

Ingredients:
1 tube (12 ounces) refrigerated flaky buttermilk biscuits
2 tablespoons butter, melted
2 tablespoons crumbled blue cheese
1 tablespoon dried minced onion
2 teaspoons dried parsley flakes
1 garlic clove, minced
1 teaspoon dried tarragon
1 teaspoon minced chives
1/2 teaspoon celery seed
1/2 teaspoon dried oregano

-Separate biscuits and cut each into quarters. Arrange into an approximately 11-in. long loaf on a greased baking sheet. In a small bowl, combine the remaining ingredients; brush over loaf.

- Bake at 375° for 18-20 minutes or until golden brown.

Enjoy!
Laura


6.05.2012

Parmesan Pork

I love a good crock-pot meal and this is definitely one to add to your files! Quick to put together and delicious in 6 hours! Feeds a crowd, too!

I used two small pork tenderloins (totaled a little over 3 lbs.) instead of one large one but if you can't find them, grab a big one and ask your butcher to cut it in half.


It's as simple as mixing up a few ingredients like honey, Parmesan cheese and garlic (full recipe listed below) and pouring it over the meat in the crock pot.


When you pull the meat out of the crock pot six hours later, it will be falling apart and extremely tender aka delicious. Pour the remaining sauce into a pan to let thicken and smother it over the pork like gravy. Mm, mm, good!


Parmesan Pork Roast
Yield: 4 lbs. pork, approximately 10 servings
Prep Time: 15 min. Total Time: 6 1/2 hours

Ingredients:
1 boneless whole pork loin roast (4 pounds) (or 2 small)
2/3 cup grated Parmesan cheese
1/2 cup honey
3 tablespoons soy sauce
2 tablespoons dried basil
2 tablespoons minced garlic
2 tablespoons olive oil
1/2 teaspoon salt
2 tablespoons cornstarch
1/4 cup cold water


-If using one large roast, cut in half (or have butcher do that at grocery). Place in a large slow cooker. In a small bowl, combine the cheese, honey, soy sauce, basil, garlic, oil and salt; pour over pork. Cover and cook on low for 5-1/2 to 6 hours or until a meat thermometer reads 160°.

-Remove meat to a serving platter and cover with foil to keep warm. Transfer sauce to a small saucepan. Bring liquid to a boil. Combine cornstarch and water until smooth. Gradually stir into pan. Bring to a boil. Cook and stir for 2 minutes or until thickened. Slice the roast (or if it was like mine, pull it apart with a fork) and serve with thickened sauce.

Enjoy!
Laura


5.24.2012

Go-To Dinner

SkinnyTaste strikes again!

I've found our new go-to summer dinner and it is a complete hit!

Spaghetti with Sauteed Chicken and Grape Tomatoes.


It's a light, fresh, scrumptious dish that is easy to make and easy to clean up! I also love that it doesn't require a lot of extra ingredients from what I already have at home so I can quickly pick them up at the grocery on short notice!

Trust me on this one, y'all. It will be your new go-to, as well.

I followed the original recipe found here and added in a large splash of balsamic vinegar inspired by here!

Enjoy!
Laura